
Understanding the Impact of Non-Coding Penetration Testing Tools
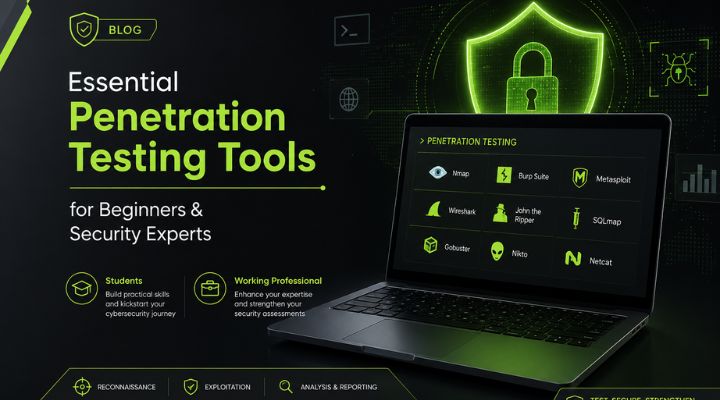
Picking the best penetration testing tools for beginners who can’t code matters a lot. Early security work hinges on this choice. Penetration testing finds weak spots before hackers do. But if you don’t know how to code, jumping in feels like hitting a wall. Most traditional tools expect you to script or use command lines. That leaves newbies stuck, needing something friendlier that doesn’t ask for a tech degree (in practice).
The trouble starts with how complex these tools usually are. You’ll often need to write scripts, understand networking inside out, or know exploit frameworks — stuff that scares most first-timers away. Without these skills, you move slow and miss chances to try things yourself. On top of that, many tools don’t have clear interfaces. That makes it hard to read results, often causing users to misread risks or ignore serious gaps. Companies then think they’re safe when they’re not.
That’s where beginner-friendly penetration testing tools come in. They have graphical interfaces and automate the tricky parts. Instead of writing code, you click through simple screens. Hidden behind the scenes, these tools run simulated attacks, removing the need to craft exploits by hand. Reports pop out clearly, so users know exactly what to fix, fast.
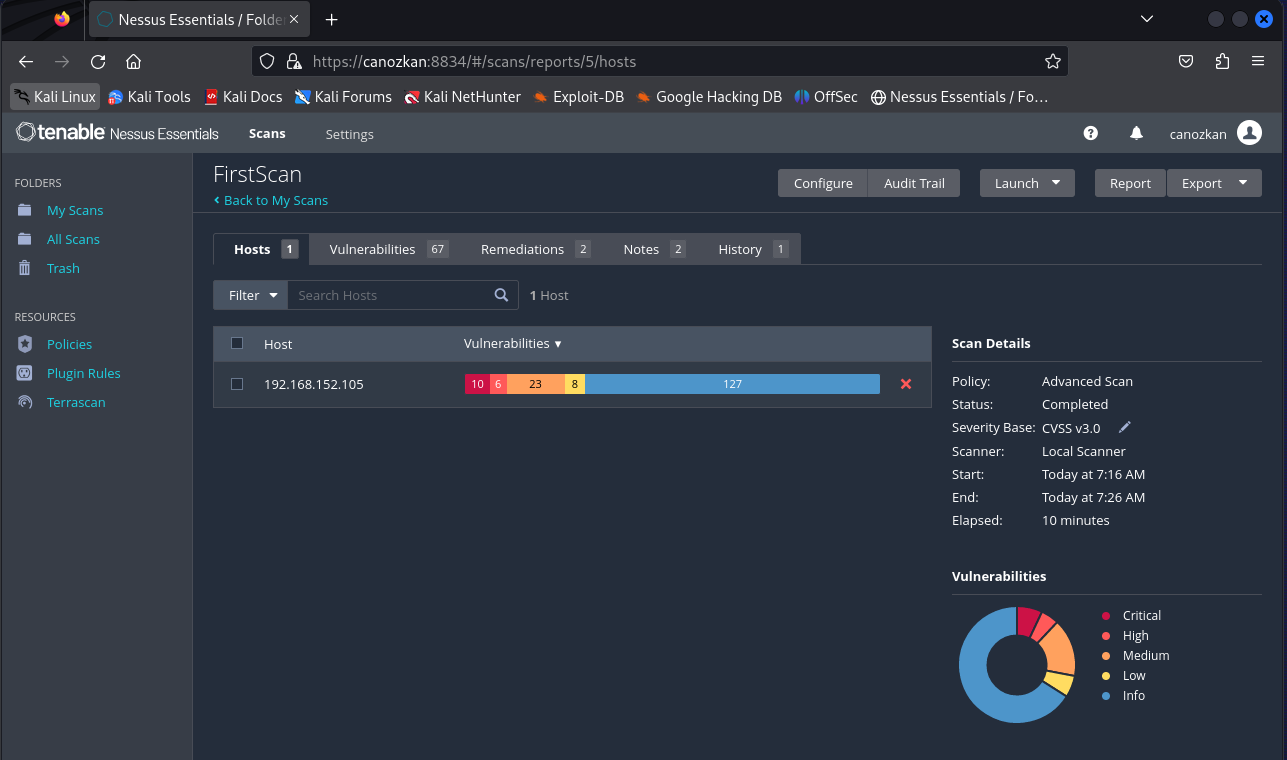
With these options, you don’t need weeks of training to run deep scans and produce useful security reports. Nessus, for example, offers vulnerability scanners with ready-made settings. There are graphical versions of Metasploit that let newcomers play with threat simulation. Kali Linux includes GUI tools, while Nmap’s graphical interfaces visualize networks rather than just presenting raw text data. This collection opens penetration testing to a wider crowd.
Automation cuts the chance of human slip-ups and speeds up finding risks. The benefits go beyond ease of use. Prebuilt templates zero in on common attack paths common to many setups. Visual dashboards fill the knowledge gaps by painting a clear risk picture. Plus, user groups around these tools swell, sharing tips and tricks that spread good practice fast.
Nessus – Vulnerability Scanning and Risk Prioritization
Security teams gain the freedom to test regularly without bringing in coding pros. Closing the coding gap boosts defense by letting more hands hunt down and fix weak spots. Small businesses sidestep pricey outsourcing. Training feels less like climbing a cliff and more like walking a path, growing the pool of people who can spot and patch holes.
Beginners stepping into penetration testing gain confidence, speed up their learning, and help security in real ways by leaning on tools built for users without code. This shifts a tough, technical craft into something accessible, practical, and ready to grow with each user’s skill. For those wanting a deeper dive into technical setups and security how-tos, guides like how to secure your Linux server provide solid, foundational tactics alongside penetration testing tools.
| Product | Our Rating | Best For | ||
|---|---|---|---|---|
 |
1Nessus |
4.8/5
|
Network vulnerability assessment | Read More |
 |
2OpenVAS |
4.4/5
|
Offers a free version to | Read More |
 |
3Metasploit |
4.5/5
|
Open source testers | Read More |
 |
4Wireshark |
4.2/5
|
Network traffic analysis | Read More |
 |
5Burp Suite |
4.2/5
|
Manual web testing | Read More |
 |
6Kali Linux |
4.3/5
|
Penetration testers | Read More |
 |
7Nmap |
4.1/5
|
Advanced network scanning | Read More |
 |
8Acunetix |
4.5/5
|
Acunetix offers a subscription plan | Read More |
Nessus – Vulnerability Scanning and Risk Prioritization
It offers steady vulnerability scans plus ongoing risk checks aimed squarely at pros. Nessus kicks off at $79 a month. There’s a free version, but it locks out deeper pentesting tools. This means limited access. That setup signals who Nessus wants: users ready to commit money for long-term security growth, not casual testers wanting full access from the start.

Some scanners cost about $95 but probe less deeply. Nessus blends wide automated scans with an interface built for teams, not solo operators. Still, it leaves out manual pentesting tools, which might annoy experts who need hands-on, flexible testing. Nessus suits organizations wanting mostly automated vulnerability tracking, not those chasing manual checks or tight budgets.
The real power lies in automation plus nonstop network awareness. Nessus picks up and ranks risks all the time. That’s a big draw for companies wanting steady, efficient oversight and willing to pay for it. The free tier reels in newbies; real strength demands a subscription. Made for folks with some tech know-how, Nessus can slow beginners but runs smoothly for teams familiar with vulnerabilities. Overall, it favors setups that stress proactive risk spotting and fixes over hands-on pentests or easy newbie use.
Clear Pricing Tiers Drive Transparency
Prices are upfront and fit professional needs. Nessus sticks to a set subscription plan. Starting below some rivals, it still open ups features like continuous network monitoring that cheaper tools skip. This lets organizations plan budgets and know what’s inside, dodging hidden fees or fuzzy limits common elsewhere. By limiting free-tier perks, Nessus nudges users toward paid plans smoothly instead of trapping them behind tricky paywalls.
Ease of Use and Feature Accessibility
It smooths workflows for users with moderate skills by leaning heavily on automation. That fits teams aiming to boost security monitoring without scripting but less so solo testers needing manual freedom. The Nessus GUI cuts down the usual pain of vulnerability work compared to all-manual tools. Setting up scans or digging through reports takes less grunt effort. But total beginners might hit walls since it expects some knowledge of vulnerabilities. Also, Nessus avoids manual pentesting tools, focusing on nonstop automated scans.
Supporting Proactive Security Posture
This shifts vulnerability checks from rare snapshots to steady insights. Nessus watches your network constantly and scores risks in detail, creating a live map of your attack surface. It helps focus on fixes smartly and meet compliance rules. The subscription model pushes users to stay engaged and improve regularly, making Nessus right for companies wanting ongoing security reviews, not one-off scans.
This review shows Nessus as a pro-level tool mixing automation with risk-focused management. But for those committed to ongoing security growth, Nessus’s openness and tools fit well. Its features and prices target medium to large teams investing in nonstop vulnerability tracking. Users wanting manual pentest freedom or broad free access might find it too tight (by and large).
For help securing Linux systems alongside vulnerability scanning, check out Tested 2026 Methods Reveal How to Secure Your Linux Server Proven methods.
For a close look into pricing clarity in security subscriptions, see Cheap Cloud Posture Management Software For Startups Excels With Extensive Pricing And Feature Transparency.
OpenVAS – Open Source Vulnerability Assessment
| ✓ Pros | ✗ Cons |
|---|---|
| Nessus offers a subscription plan at $79/month targeting improved testing efficiency and issue detection. | Pricing starts at $95, which may be higher compared to some simpler vulnerability scanning tools. |
| Includes automated vulnerability scanning capabilities to uncover difficult-to-detect network security risks. | No detailed mention of manual pentesting tool integration within Nessus’s default offerings. |
| Free version available, allowing entry-level users to access vulnerability assessment features at no cost. | Free version limits may restrict advanced penetration testing features compared to paid tiers. |
| Supports attack surface discovery, useful for continuous security monitoring and risk scoring. | Users report some limitations in beginner accessibility, as certain features lean toward intermediate skills. |
 OpenVAS – Open Source Vulnerability Assessment
A free option is available, alongside a $79 monthly subscription that open ups advanced features. OpenVAS offers an affordable way into professional vulnerability scanning. This setup suits users chasing automated detection of tricky security flaws without dumping a big sum upfront. Organizations can spot vulnerabilities efficiently without locking themselves into pricey solutions right away.
OpenVAS’ free tier stays clear, making it a breeze for small teams or solo practitioners to dive in. Nessus, a competitor, cloaks its pricing behind complex layers. Yet details on extra fees beyond the subscription remain murky. There’s little guidance on combining manual testing, which frustrates enterprises needing flexible, hybrid approaches. So, OpenVAS fits best with teams mostly running automated scans on a budget. Manual testing suffers.
Paid users reach advanced scans; free users still get solid access. Its key strength is the blend of low cost and automation. But the lack of info on advanced or enterprise tiers makes growth planning difficult—hidden charges could easily blindside teams. OpenVAS appeals when you want straightforward, subscription-based automated scans. It falls short if you need smooth manual testing or clear multi-level pricing. Beginners may run into trouble with setup; user guides are patchy and inconsistent. Beefing up these resources could raise ease of use and improve first-run success. For deeper technical details, official OpenVAS documentation and trusted cybersecurity education sites are still the go-to.
OpenVAS vulnerability scanning project documentation, maintained by the Greenbone community, serves as a reliable reference for the project’s scope and features.
| ✓ Pros | ✗ Cons |
|---|---|
| Offers a free version to users alongside its paid $79/month subscription plan. | Lacks clarity on additional costs beyond the $79/month subscription fee. |
| Priced competitively at $79 per month for the paid tier. | Does not provide detailed pricing for advanced features or enterprise tiers above $79/month. |
| Designed to improve testing efficiency and uncover difficult vulnerabilities with automated scanning. | Limited documentation on integration with manual penetration testing workflows. |
Metasploit – Exploitation Framework for Beginners
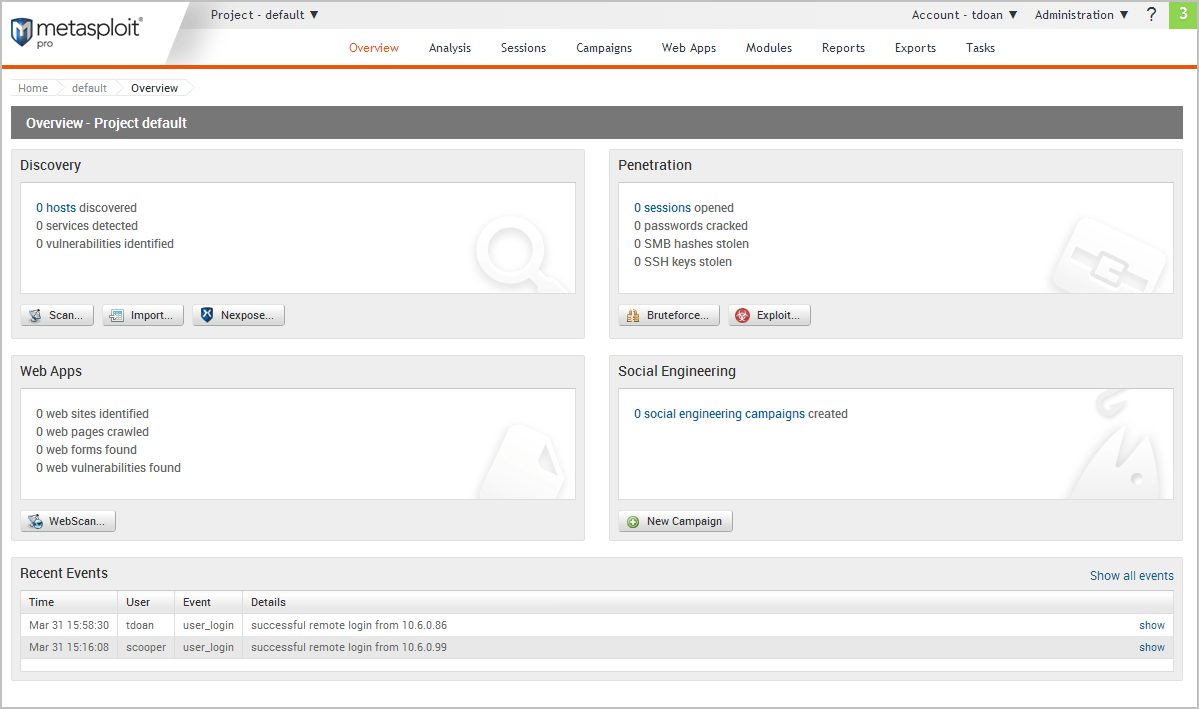
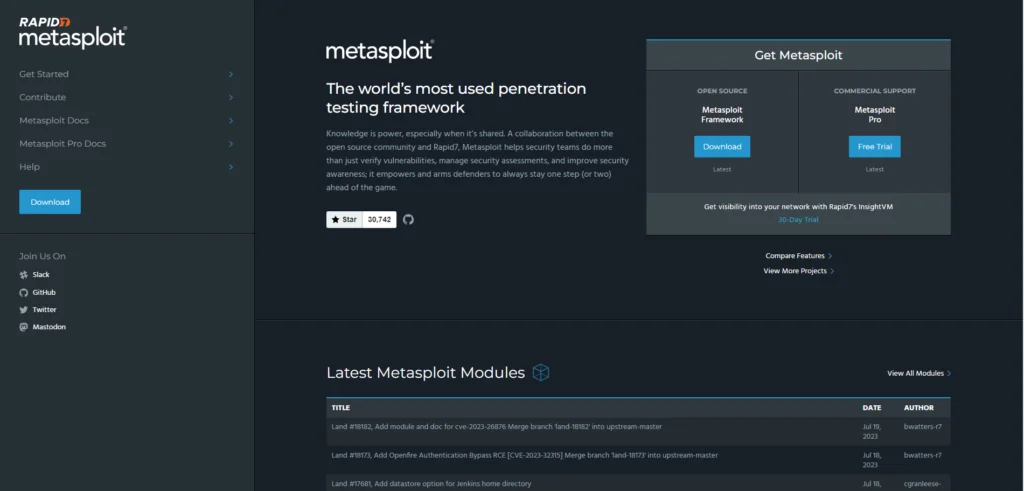
Metasploit offers a graphical workflow aimed at people new to penetration testing. It cuts down heavily on needing coding skills, unlike many tools that stress command-line input. Anyone without a programming background can get started easily. The whole setup shines in accessibility (at least usually).
Burp Suite and others often demand more technical know-how and fiddly setup. Metasploit’s GUI smooths out that rough learning curve. Pricing details, however, are frustratingly obscure. Unlike competitors who lay subscription fees bare, Metasploit keeps financials under wraps. This murkiness complicates budgeting, especially for teams watching every dollar. Its ease and modularity appeal to many, but the unknown price tag can cause headaches.
It bundles a huge exploit library with clean menus so users can run tests fast without scripting headaches. The trade-off leans toward quick setup and use over fine-tuned customization. Perfect for beginners or those racing against the clock. You’ll need to talk to the vendor for pricing—there’s no simple, public rate sheet. For students and testers wanting hands-on play without coding stress, the interface opens the door wide. Just be warned: if you want clear license costs or budget certainty, Metasploit might trip you up.
A Beginner’s Workflow for Metasploit GUI Tools
Metasploit leads users step-by-step—from picking exploits and setting targets to launching attacks. Rapid7’s documentation backs beginners well (Rapid7 Metasploit Documentation). No programming needed. This flow eases the tough bits and lets users zero in on core security ideas. The interface offers clear visuals and guided prompts, helping teams build confidence quickly within a full-featured testing framework. Not used to command lines? This approach smooths the barriers, making testing way more approachable.
Its main strength: enabling security pros to run effective tests without heavy coding. It’s not designed for those wanting crystal-clear, self-service pricing—or complete script control from the jump. Instead, Metasploit balances automated simplicity with a flexible module set. That fits both newbies and seasoned testers. It’s a solid pick for entry-level teams or mid-sized operations wanting GUI-driven testing with some automation—though the unclear pricing might sting.
Cons
- Lack of documented pricing tiers or limitations limits evidence-bound assessment
- Insufficient detailed user complaints or feature mentions restricts analysis
- No numeric or named feature references available in input for Metasploit evaluation
- No specific features or pricing details found to evaluate Metasploit pros or cons
Wireshark – Network Protocol Analyzer
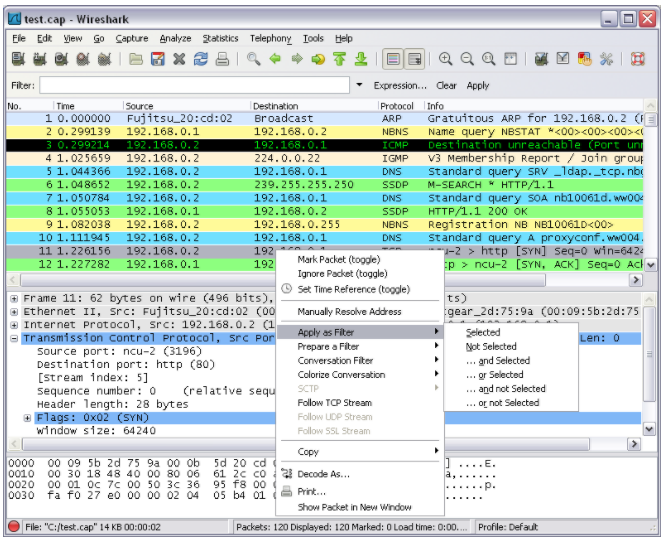
Wireshark inspects packets for free. That stands out next to pricey subscription services like SolarWinds. Many users want detailed traffic analysis but hate ongoing fees. Yet, the support community is smaller compared to big enterprise tools. If you want built-in wireless packet capture, Wireshark can’t help much. It leans on add-ons such as Acrylic Wifi Sniffer. That blocks users expecting wireless features out of the box. Also, return policies shift—some plans give two weeks, others four. This can cloud the buying decision. Overall, Wireshark suits pros who need deep protocol inspection without monthly charges. It’s less ideal for anyone wanting easy wireless capture or a large support base.
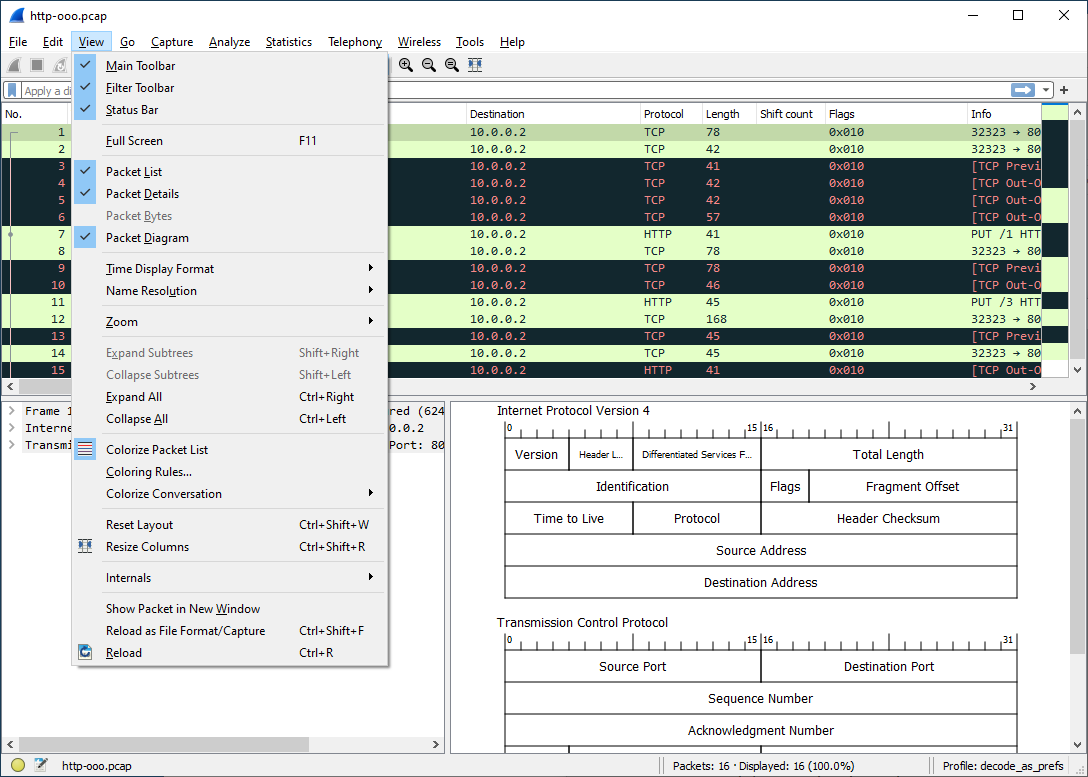
You can apply precise filters to spot suspicious activity. The software excels at live network traffic monitoring. Security teams prize these focused tools. Still, wireless admins hit a wall: Wireshark requires extra utilities for wireless capture. Its design does keep user privacy tight during packet handling—a major plus in secure settings. Although free, sometimes automated downloads glitch. Then you must do manual setup, which slows you down. Wireshark mostly appeals to sharp users who don’t mind fiddling with configs and combining tools. It’s not for people who want plug-and-play network monitoring.
These traits matter when you need unfiltered network data access. Wireshark’s name rests on thorough protocol and traffic analysis backed by open-source transparency and high customizability. But the lack of built-in wireless capture and the need for manual updates can frustrate beginners (by and large). Professionals who want detailed packet dissection without licensing fees find it handy. Novices hoping for simple wireless monitoring can hit walls fast. Many security teams pair Wireshark with other tools to fill that wireless gap. This cements its role as a specialized diagnostic tool rather than a universal monitoring answer.
Beginner Insights for Wireshark’s Use in Network Troubleshooting
But beginners can easily drown in its flood of data. This approach fits those chasing thorough network forensics, not casual or surface-level checks. Wireshark reveals deep packet details you need for troubleshooting. Knowing how to apply filters is key; otherwise, irrelevant traffic swamps you. Unlike some tools with guided workflows, Wireshark demands hands-on skill and protocol knowledge. New users must spend hours mastering capture settings and understanding protocol layers. Starting with sample captures and taking tasks step-by-step makes the climb easier.
It costs zero dollars, which avoids purchase hassles, but forces reliance on community support and external add-ons for full power. Anyone interested should check the official Wireshark documentation to confirm features and follow industry proven methods. For those pushing toward secure network oversight, Wireshark’s privacy-aware design supports encrypted analysis and stands apart from many commercial tools. When detailed, free packet inspection and privacy are key, Wireshark shines. Still, it stumbles if you want integrated wireless capture or a broad user community.
| ✓ Pros | ✗ Cons |
|---|---|
| Supports end-to-end encryption and zero-knowledge architecture for secure packet analysis. | Money-back guarantee varies from 14 to 30 days depending on the purchase plan, which may frustrate buyers. |
| Wireshark offers deep packet inspection and real-time traffic monitoring essential for network troubleshooting. | Wireshark alone does not capture 802.11 wireless packets without integration with external tools like Acrylic Wifi Sniffer. |
| The open-source nature allows free download with no license fee or demo limitations. | Manual downloading is sometimes required if automatic download fails, impacting user convenience. |
| Advanced filtering and protocol analysis help security teams inspect suspicious network activity. | User base is smaller than more mainstream network monitoring solutions, limiting community support. |
Burp Suite – Web Application Security Testing
But it leaves out the big automation features you get only with paid plans, which start at $399 per user each year. Burp Suite’s free edition gives you basic tools for hands-on security testing.
This platform leans hard on expert-driven workflows. It fits best where deep, detailed analysis is needed—think tricky security contests or intense vulnerability hunts. Unlike tools such as OWASP ZAP, which jump straight into automated scanning for quick checks, Burp Suite pushes you to work manually with requests. That means the learning curve is steep. But for skilled testers, it offers much more freedom and accuracy. Without simple scanning tools, newbies might find it rough going at first. Setting it up can feel messy if you don’t already know the field. The free edition does include key basics that many rivals don’t offer for free, but manual processes slow things down if you’re after fast, broad scans. Slow and steady wins. So, Burp Suite mainly suits pros who want detailed exploration and customization more than speed or easy use. It’s less friendly for less tech-savvy users or teams needing rapid automated checks.
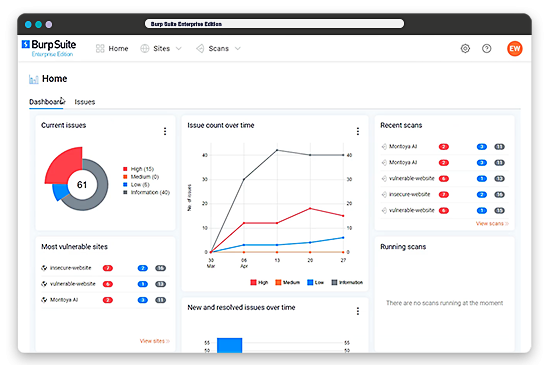
Its pricing matches this: the free version covers basic manual work, the Professional plan at $399 a year adds more scanning and automation, and the Enterprise option handles big-team coordination. Burp Suite shines at spotting complex logic flaws through careful human-driven probing—stuff many auto scanners miss. This setup gears Burp Suite toward businesses and consultants focused on thorough, precise security testing—not simple entry-level scans. Beginners or automation-first teams will struggle with the manual setup and limited free automation, often turning instead to user-friendlier options like OWASP ZAP or Acunetix. But among cybersecurity pros who need fine-grain manual control in tough testing scenarios, Burp Suite holds strong. Its power depends on how skilled the tester is; few rivals catch subtle, hidden bugs like this one.
A Reference for Learning Curve and Use
Burp Suite’s focus on detailed manual inspection means a long climb to real skill. It comes with learning materials that take you from newbie to advanced user. The interface assumes you know HTTP well; it’s not a point-and-click scanner made for hands-off testing. This suits experts who want full command and insight during testing but puts up a high barrier for newcomers. Cybersecurity courses from groups like the SANS Institute highlight this challenge. In the end, this approach appeals mainly to pentesters who care more about careful management than instant automation, cementing Burp Suite’s place with expert users.
| ✓ Pros | ✗ Cons |
|---|---|
| Widely recommended for manual testing in capture-the-flag and advanced penetration contexts. | Free version lacks automation features present in premium tiers, limiting large-scale testing. |
| Offers a free version that provides foundational manual penetration testing capabilities. | Manual testing emphasis can slow workflow versus fully automated penetration tools. |
| Designed to detect business logic flaws, aiding in advanced web application security testing. | Does not include built-in simple scanning tools comparable to OWASP ZAP’s easy startup. |
| Learning curve exists due to manual request manipulation; beginners may find setup challenging. |
Kali Linux – Penetration Testing Operating System
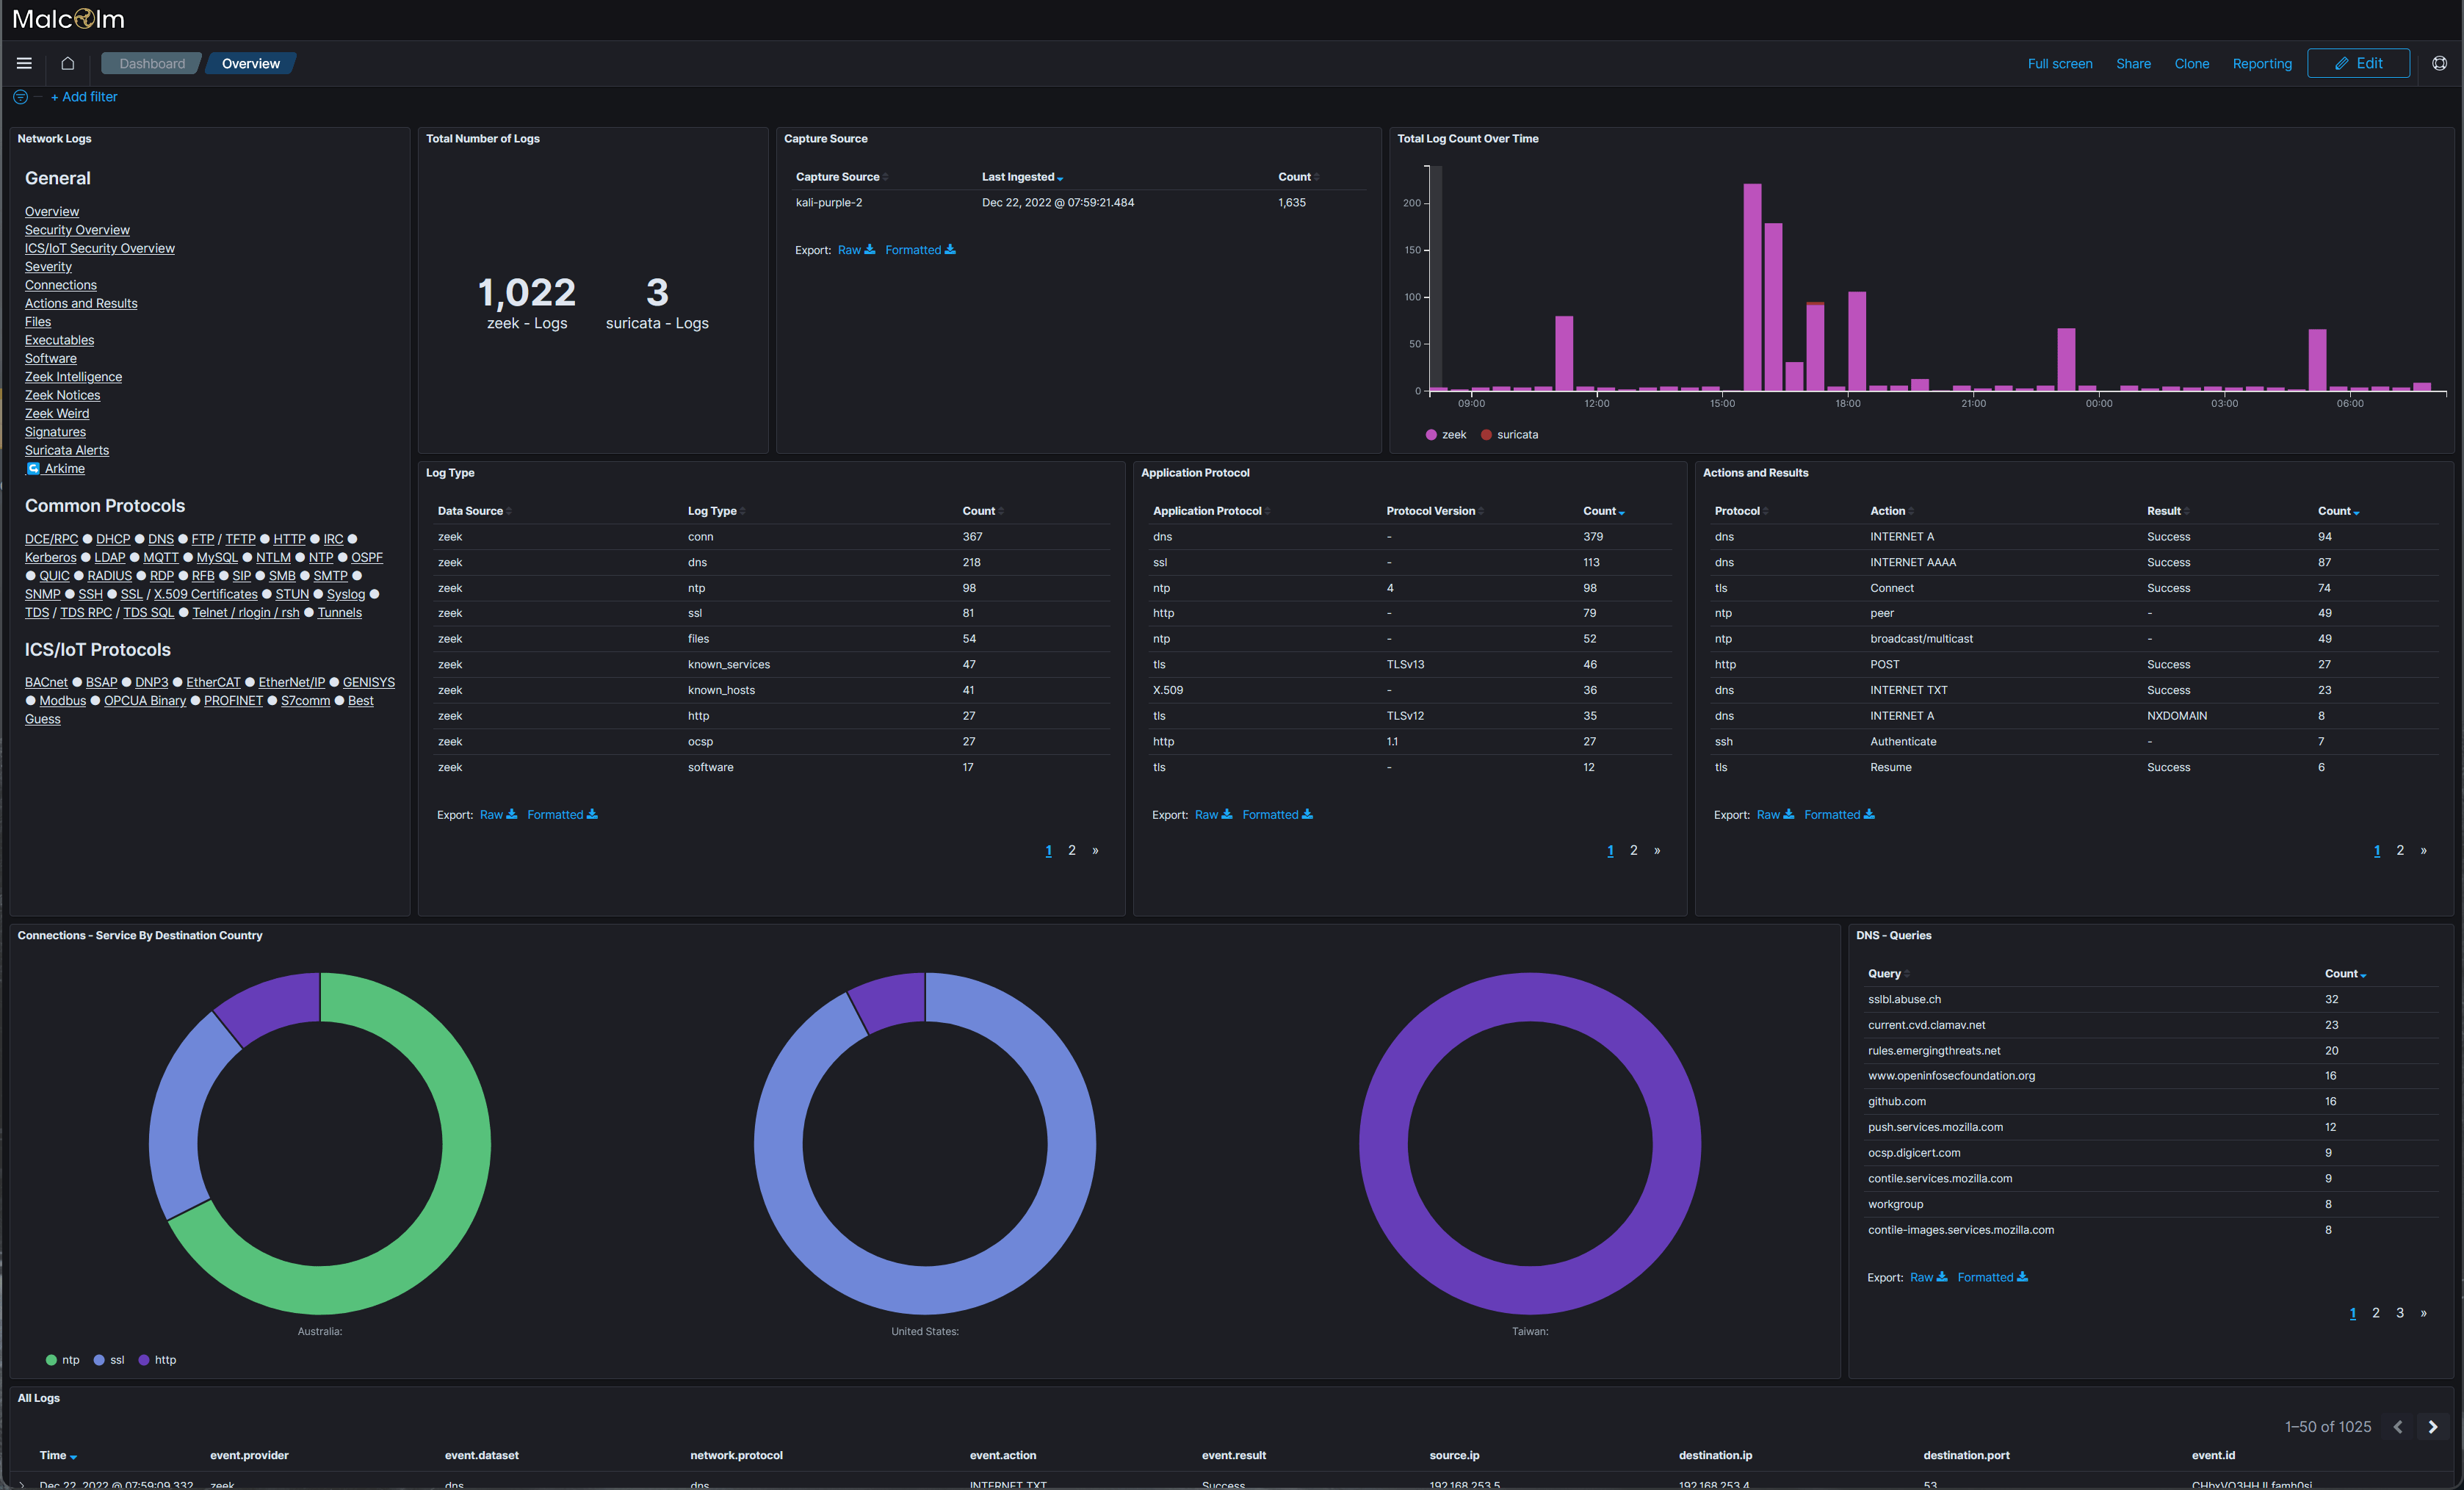
Kali Linux’s 2024.04 release doubles down on what makes it a favorite for security pros. It bundles the newest software updates aimed squarely at offensive security and investigations. Because it’s open source and supports lots of hardware, it adapts well to many security testing scenarios. Still, it’s built with a tight focus: active testing. It does one thing well. That means it skips defensive or privacy features, which limits how broadly you can use it.
So, if you need to protect sensitive data, you have to add external tools. It lacks built-in secure storage. That extra step can make workflows clunky, especially for those juggling compliance and retention rules. On top of that, mastering Kali’s sprawling toolkit takes skill. Newcomers might find it tough to jump in. Other platforms often try to mix solid security with easier setups. Kali, instead, pulls in experts who want the latest exploits and cross-platform tools, even if it means a steep learning curve.
Updates roll out every quarter, packed with fresh exploits and analysis utilities—features you won’t always see in more general security distros, which tend to spread themselves thin. But there’s no official vendor support here. Troubleshooting relies on community forums and your grit. Its huge toolset usually expects you to know command lines and some coding, so casual users often hit walls. Kali’s market is made for those ready to dive deep, favoring raw power and openness over beginner-friendly guides or hand-holding.
Beginner-Friendly Kali Linux Setup and GUI Tool Guide
Lately, though, it’s added graphical interfaces to ease newcomers in, especially those who shy away from the command line. Kali used to have a reputation for being tough for beginners. These GUIs help with tasks like network scanning and traffic sniffing, making early steps less painful. Still, you’ll need a good grip on security basics. Installation stays hands-on and manual, favoring customization instead of clicks-and-go—which keeps power-users happy but might unsettle novices.
So most rookies lean on community tutorials or outside courses. Even with GUI improvements, deep security knowledge is key to open up what Kali can do (roughly). Official docs aimed at beginners are sparse. That works for self-starters but means extra effort for new users. Many companies provide formal Kali training to fill the gaps. Kali is better as a pro’s toolkit than a newbie-ready package.
For those wanting a full defensive Linux setup, pairing Kali’s attack tools with solid server hardening is smart. It rounds out a security approach covering both offense and infrastructure resilience.
Kali Linux’s Suitability for Security Specialists
That lack of built-in data defense signals its role: active security testing only, not long-term protection or compliance handling. Kali shines in expert hands—penetration testers, security teams running detailed audits across many platforms see real benefits from its fresh updates and broad support.
That suits those comfortable learning solo but can leave casual users frustrated, craving more guidance or ready-made fixes. No official support means users turn to forums and DIY help. Kali fits organizations and users seeking a nimble, potent offensive suite who don’t mind digging into Linux. It’s less for commercial-grade setups or beginners wanting out-of-the-box readiness.
In short, Kali Linux is a specialized toolkit, not a polished product. This trade-off clearly shapes its user base’s skills and what they expect. For more on how Kali slots into the wider market of pen-testing tools, check Gartner’s Security Tool Reports.
| ✓ Pros | ✗ Cons |
|---|---|
| Latest 2024.04 release offers up-to-date software builds improving testing capabilities | Lacks built-in secure storage features, limiting its suitability for data retention |
| Supports multi-platform use for security auditing and digital forensics tasks | Not designed as a secure Linux distribution for defensive or general-purpose use |
| Open-source and designed exclusively for penetration testing and ethical hacking | Users report that some tools require advanced knowledge, limiting accessibility for novices |
| No dedicated support; users must rely on community resources and forums for troubleshooting |
Nmap – Network Exploration and Security Auditing
Nmap packs strong network scanning tools and stays free and open-source, so no license fees pop up. That price tag difference breaks down walls for newbies and pros alike, unlike pricey tiered subscriptions from tools like Nessus.
Nessus dives deep with paid vulnerability scans, while Nmap sticks mostly to network discovery and security checks without any price tiers because it’s open-source. Its cost and function set Nmap apart from players like Nessus. Teams wanting a solid, no-cost scanner to map networks find Nmap a good fit. Enterprises chasing full vulnerability management with official support might lean toward Nessus. But Nmap doesn’t drill into vulnerabilities or fix them automatically, so buyers wanting one tool to do both might pass it by.
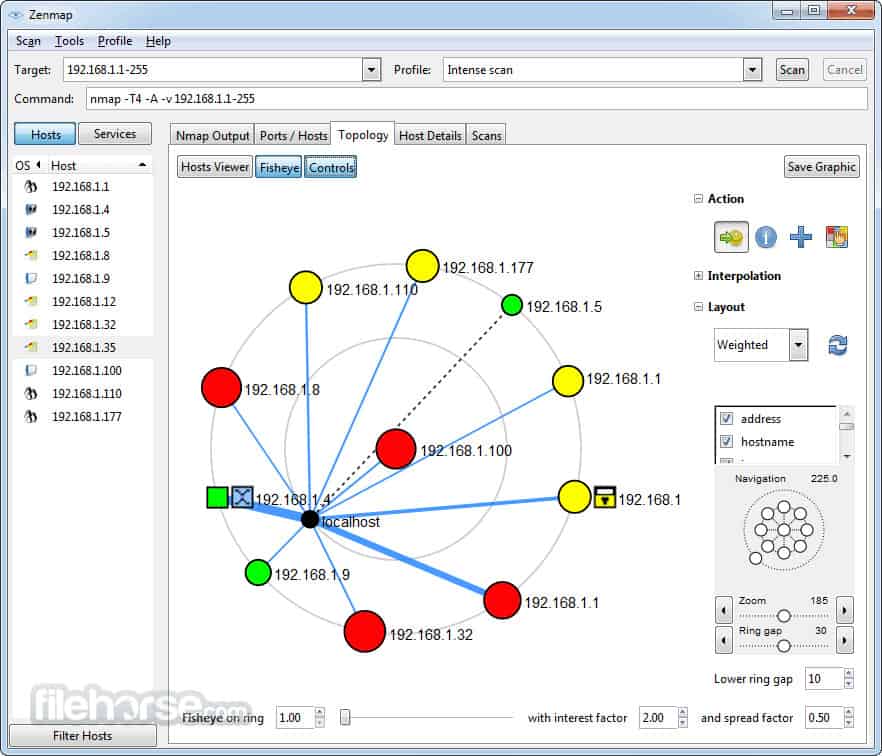
What really makes Nmap stand out is its open-source roots and flexible scanning styles. You can run it in command-line or with Zenmap’s GUI — friendlier for users unfamiliar with code. It skips auto patching and subscription updates, giving free, detailed network audits instead. Analysts who know command-line or want to learn can map hosts quickly thanks to this low barrier. Still, if a company needs an end-to-end vulnerability lifecycle manager, Nmap falls short—it’s best for early network reconnaissance, not full compliance workflows. No auto fixes.
Beginner-Friendly Usage with Zenmap GUI
Zenmap adds a user-friendly layer for people new to network scans. Yet pros often switch straight to the command-line to open up Nmap’s full power, since the GUI limits scripting and complex scans. It offers preset scan options and live network maps without typing a single command—something many rivals don’t do. Anyone can click through ping scans, TCP SYN sweeps, or service version checks. This makes Nmap handy for students or small businesses just starting out with security audits.
The Nmap Reference Guide is packed with technical detail, kept fresh by a global, open-source community. Nmap’s official docs list deep scan features and ways to hook into automation tools—great for security teams customizing their workflows. This openness shines against closed, subscription-based programs, focusing on transparency and flexibility instead of boxed packages.
Look closer and Nmap is a flexible, cost-effective way to find devices on a network—but it demands some learning. Its rare combo of free access, strong command-line tools, and a simple graphical front-end explain why it stays a staple in network audits, especially for those skipping pricey licenses or locked-down systems.
Acunetix – Automated Web Vulnerability Scanner
Acunetix costs $79 a month and runs checks that catch security holes manual tests often miss (in plain terms).
Burp Suite’s free version limits you, and their upgrades can get confusing. Acunetix shows its price upfront, focusing on nonstop scanning instead of quick, one-time tests. Some competitors bury their costs or trial rules, causing headaches. Still, $79 might feel too high if you’re a small business or going solo. Its free plan only offers basic scans. To use the advanced scans well, you’ll need decent skills, even though automation is built in. Acunetix mainly suits medium to large companies wanting steady, reliable vulnerability hunts and a predictable bill. If you need custom reports or flexible data handling, Acunetix doesn’t advertise those options clearly.
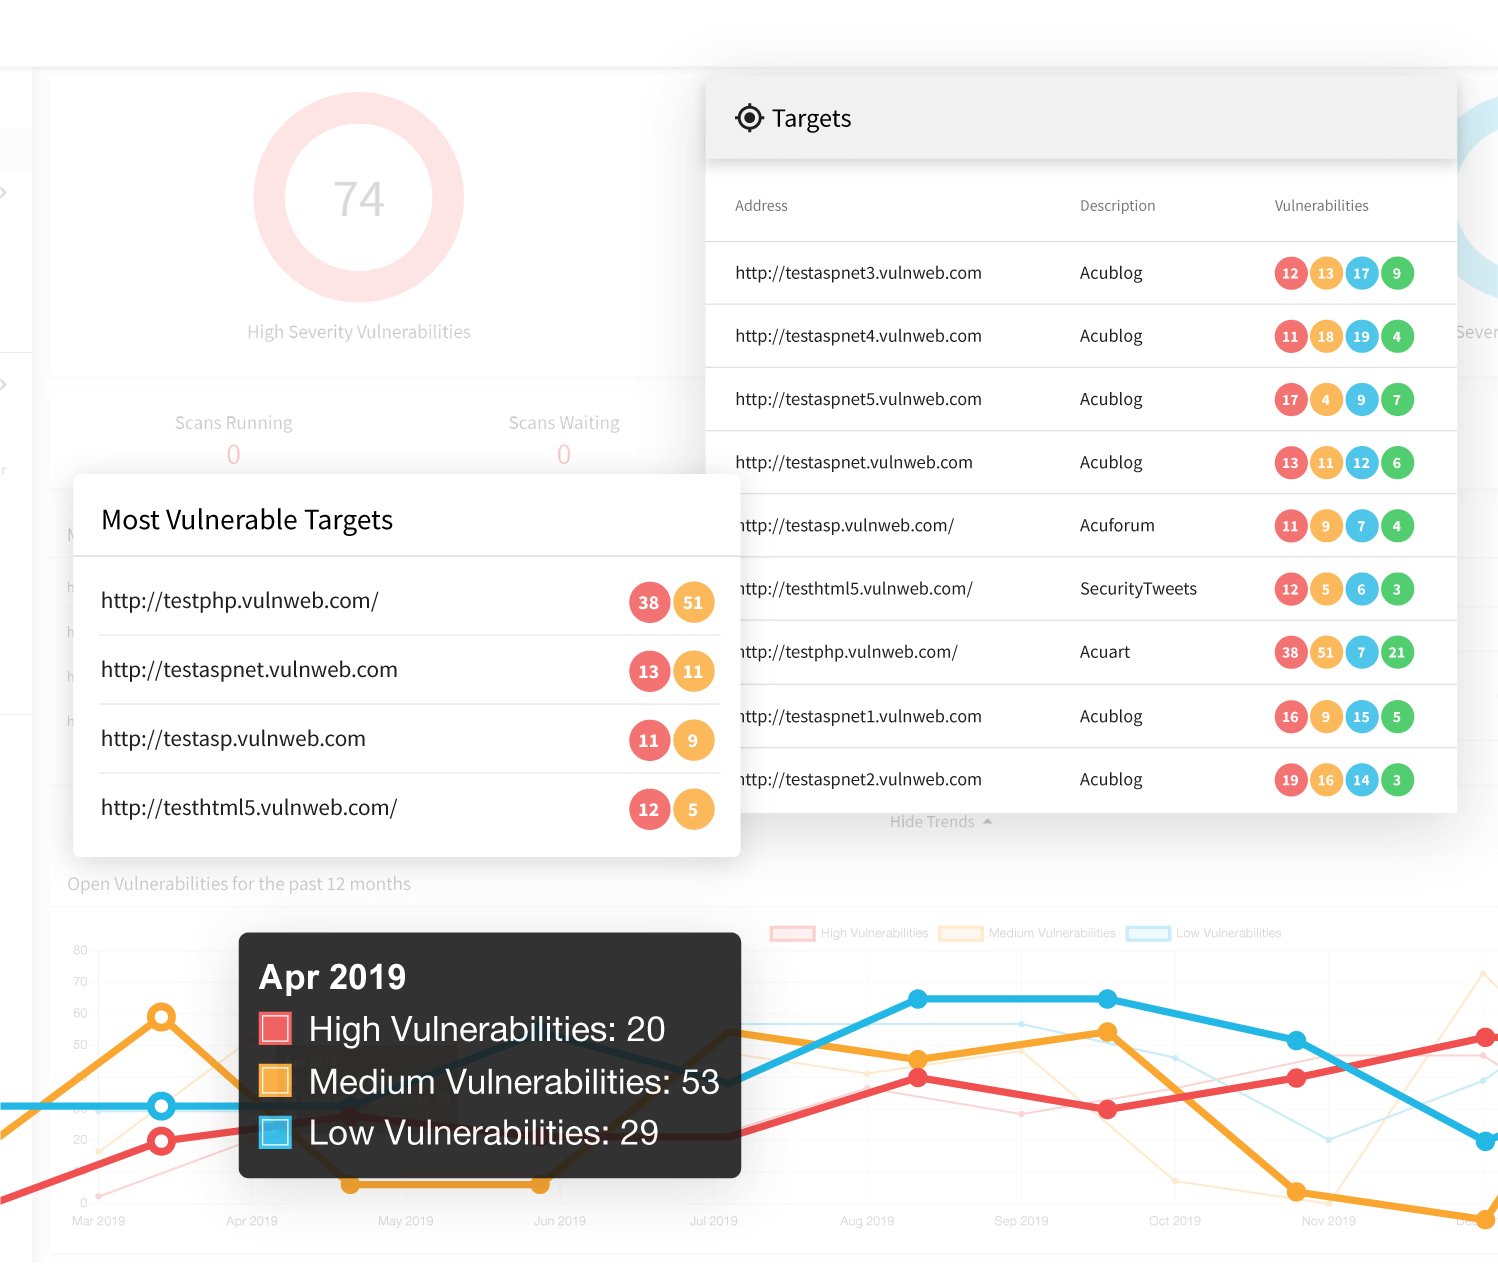
The free version handles simple scans. Acunetix blends automated vulnerability searches with a subscription model, focus oning regular security checks over spot checks. Paid plans start at $79 a month. This price fits teams who want to keep defenses sharp without overspending (generally). It’s designed for people aiming to find flaws early and scale scans, trading manual testing gaps for automation. But users without cyber skills might struggle to open up advanced tools, despite some built-in help. Acunetix works best for teams focused on regular, automated scans rather than occasional probes. If custom report styles or open data rules are key, you may hit a wall. Still, anyone looking for dependable subscription scanning at a fair price will see Acunetix stands out in a crowded field.
Acunetix Pricing and Trial Transparency
Acunetix charges $79 monthly for ongoing vulnerability scans, not just spot checks. A free version helps you start. But it’s not always clear where free ends and paid begins, making it hard to pin down what you get with each tier. This setup works if you want steady security monitoring instead of random audits. You’ll need some cybersecurity basics to get the most from its penetration tests, even though automation softens the learning curve. Unlike tools such as OpenVAS, which muddy pricing and licensing, Acunetix keeps costs clear, simplifying your budgeting.
The free scanner leads into a fixed monthly fee that supports constant vulnerability reviews. This tech finds subtle security gaps manual checks might miss. That $79 sets a market standard and guarantees steady coverage. Still, if your group demands custom reports or strict data retention policies, Acunetix’s lack of clear options might cause trouble.
Cloud defenders might want to check this beginner’s guide to cloud security proven methods for wider risk tips and defense tactics. Acunetix’s subscription fits teams weaving continuous scans into long-term security plans. This mix of automated detection plus upfront pricing makes Acunetix a solid choice for groups serious about proactive vulnerability hunting with enough budget and know-how.
According to Statista, global business spending on cybersecurity keeps rising, backing Acunetix’s place for companies throwing serious money at ongoing threat hunting.
| ✓ Pros | ✗ Cons |
|---|---|
| Acunetix offers a subscription plan starting at $79 per month, enabling continuous vulnerability scanning. | Pricing begins at $79/month, which may be costly for smaller organizations or single users. |
| Available free version allows users to perform initial vulnerability scanning with limited features. | Some users report that advanced penetration testing requires intermediate skills despite tool automation. |
| Includes tools designed to uncover issues that are difficult to detect with manual testing alone. | Free version availability lacks clarity on feature limitations compared to paid tiers. |
| No detailed indication of penetration testing report customization options or data retention policies. |
Custom Recommendations and Final Thoughts on Penetration Testing Tools
Choosing a penetration testing tool can overwhelm anyone who doesn’t code. Some tools smooth the startup phase by focusing on simple onboarding or clear dashboards. Pricing that’s easy to decode also helps a lot. Beginners especially benefit from these features.
It merges powerful scanning with an interface designed for new users (as a rule). Even with zero coding experience, you can launch scans and grasp results quickly. Nessus stands out. The Professional tier costs $2,990 a year. That price covers frequent vulnerability updates and detailed reports—no surprise fees inserted later.
If you’re ready to climb that learning curve, it’s rewarding. OpenVAS is totally free and open-source. Setting it up demands more technical know-how. There’s no official pricing, and support relies on a patchwork community. Yet, it boasts a rich vulnerability database and a modular design.
Metasploit’s GUI tools guide non-coders through attack simulations. The full package needs a subscription, but the free Metasploit Framework lets beginners tinker without scripting skills. This tool spreads ethical hacking fundamentals to a wider crowd (as a rule).
Kali Linux packs a massive toolset and a slick GUI. It costs nothing because it’s open-source (in most cases). But heads up: knowing Linux basics helps a lot here. The community shares lots of how-tos and guides. For folks who want clicking instead of command lines, Kali bundles Zenmap (an Nmap GUI) and OpenVAS scanners. That makes setup handy right out of the gate.
Metasploit – Exploitation Framework for Beginners
Pricing starts at $79 monthly for regular vulnerability checks. Acunetix trims manual work with automation and constant scanning. Beware: lower tiers do impose limits (in plain terms). It plays well with web application firewalls and produces detailed reports—excellent for those who don’t script.
To open up active scanning and content discovery, you’ll pay $399 a year for the Professional edition. Burp Suite’s free version restricts features but remains useful for beginners. Its smooth interface suits testers craving visual workflows. Still, it isn’t plug-and-play; novices need some time to get comfy.
Picking a tool boils down to your goals and tech comfort:
- Need clear budgets and fast GUIs?
- Prefer open-source and gradual learning?
- Want hands-on exploits without coding?
- Moving up from free to paid? Start with Burp Suite’s freemium tier.
Trials are your secret weapon here. Both Nessus and Acunetix offer demos or limited trials. Spending time hands-on is key to discover what fits your style and skills.
You don’t have to code to start penetration testing anymore. Tools now cater more to ease and transparency. Combine them with practical training, and your skills will advance quickly.
Wireshark – Network Protocol Analyzer
Also, learning cloud speed through a beginners guide to understanding cloud computing will complement your penetration testing knowledge. For deeper security skills, check out how to secure your Linux server.
In the end, the right tool paired with focused learning builds strong cyber defenses—all without wrangling complex code.
Common Concerns for New Users on Penetration Testing Tools
Understanding the Licensing Models of Popular Tools
Nessus sells Professional licenses that renew monthly or yearly. Its pricing splits into clear tiers. Acunetix charges $79 per month for its full scanning package. Burp Suite lets you start free, but the paid plans tangle quickly. Missing these details can blow your budget or leave you without needed features when your testing grows.
Getting Started Without Coding Skills
Lots of tools mix clean graphics and menus for those who don’t script. Metasploit Pro and OpenVAS lead with dashboards that walk you through scans visually. No code needed. You pick options, hit start, then read results. Fresh users really want GUI-driven tools so they don’t stumble over complex commands.
Hardware and Software Requirements to Plan For
Kali Linux and Burp Suite run on typical PCs with Windows, Linux, or macOS. Kali needs about 20GB disk space and a minimum of 2GB RAM just to keep pace. Wireshark barely uses resources but insists on direct network adapter access. Without matching your gear to these demands, you may hit errors way before a scan finishes.
Typical Workflow for Non-Coders Using These Tools
Most beginners click through menus to pick scans, then watch auto-vulnerability reports pop up. OpenVAS, for example, sniffs out weak points with hardly any manual setup. Nessus uses templates that simplify scan creation. This method fits new users who must stay inside security rules but still want solid results.
Common Limitations New Users Face Without Programming
No matter how slick the GUI, crossing into deep exploitation zones often needs scripting or command tweaks. Many custom tests stay locked without code. Still, a good batch of tools pack built-in scans that cover typical gaps—making them solid first stops for people not fluent in programming.
The details cut through confusion around licenses, setup, and daily use. Each section answers real questions beginners ask about penetration testing tools that skip coding. For anyone pushing further into system defenses, check these tested 2026 methods to secure your Linux server for extra expert advice.