Alex has spent more than ten years digging into software, hardware, and the latest tech trends. You’ll find clear, no-nonsense reviews and sharp analysis of new gadgets and digital tools in their work. They keep it real and useful for anyone into tech.
Unlocking the Power of Ubuntu Server for Diverse Needs
Ubuntu Server stands out as a flexible, reliable operating system built to power a wide range of server environments—from enterprise web hosting to small-scale personal projects. Thanks to its open-source foundation, users gain outstanding control and flexibility, which attracts developers, system admins, and organizations eager to build resilient infrastructures without worrying about licensing fees. This ubuntu server setup guide dives into the essentials, catering to users who range from Linux beginners to experienced professionals aiming to improve their server deployments.
The platform includes an extensive collection of software packages, covering cloud computing, containerization, and virtualization tools vital to today’s IT environments. The appeal of Ubuntu Server lies in its balance between accessibility and power. Stability and security receive regular patch updates, making it dependable for essential applications. Its large community and commercial backing from Canonical ensure continuous feature updates and professional support, which benefits anyone seeking longevity and scalability for server projects.
After installing the system, the guide moves past basic setup to address key post-installation tasks like configuring software suited for roles such as web, database, file storage, or network services. This ubuntu server setup guide addresses the journey from preparing hardware or virtual machines to installing the OS efficiently. Users will discover tips for performance optimization, resource management, and routine maintenance tasks that ensure the server runs smoothly.
Networking is a fundamental aspect of any server operation, so the guide dedicates a substantive section on configuring network interfaces, firewall settings, and enabling advanced options such as VLAN tagging, bridging, and static IP assignment. It offers practical advice on how to secure networks against unauthorized access and improve connectivity for high availability.
Security hardening forms the backbone of reliable server management. This guide will include detailed, actionable steps to protect Ubuntu Server installations against common vulnerabilities, covering firewall management, SSH configuration proven methods, intrusion prevention tools, and automated update mechanisms. These measures go beyond the typical tutorials, providing complete guidance essential in a 2026 cybersecurity climate demanding zero-trust principles and proactive defenses.
Preparing for Ubuntu Server Installation
Finally, the ubuntu server setup guide anticipates potential configuration challenges by offering a troubleshooting FAQ that addresses frequent issues encountered during and after installation, alleviating frustration for users who face connectivity glitches, permission errors, or software conflicts.
Readers following this detailed ubuntu server setup guide will gain not only the technical know-how to deploy Ubuntu Server effectively but also how to maintain, secure, and adapt it as complex needs evolve—equipping them for the demands of modern server infrastructure management.
This resource can help users achieve a secure, improved environment backed by the extensive libraries and solid community support that define Ubuntu Server’s continuing prominence. For more detailed technical standards on Linux server management, refer to the guidelines from the National Institute of Standards and Technology, which provide authoritative frameworks on secure configurations across platforms outlined in their special publications.
✅
Fact-Checked
Editorial Review
🧠
Expert Analysis
Sourced & Cited
🗓️
Updated 2026
Current & Accurate
Essential Prerequisites for a Successful Ubuntu Server Installation
Hardware Compatibility Check
Before any installation commences, verifying hardware compatibility with Ubuntu Server is fundamental. Ubuntu supports a wide range of processors, but opting for at least a 2 GHz dual-core CPU ensures smooth performance. Memory should not fall below 2 GB RAM for basic tasks, although 4 GB or more is recommended for server roles demanding higher resource allocation.
Adequate Storage Provisioning
Storage must be appropriately sized and configured before setup. A minimum of 20 GB free disk space is necessary to install the OS and base software, but planning for 50 GB or more is prudent to accommodate logs, backups, and additional packages. Using solid-state drives (SSD) can drastically improve read/write speeds, improving overall server responsiveness.
Network Infrastructure Readiness
A reliable and properly configured network is essential to deploy an Ubuntu server effectively. Assigning a static IP address ensures the server remains reachable and stable — key for hosting services. Also, confirming router compatibility and configuring any firewall rules beforehand minimizes connectivity issues during and after installation.
Download and Verify Installation Media
Acquiring the latest Ubuntu Server ISO from the official source guarantees access to up-to-date features and security patches. Authenticity verification through SHA256 checksums is essential to prevent corrupted or tampered installation files, averting potential system vulnerabilities and installation failures.
Creation of Bootable Installation Media
Transferring the Ubuntu Server ISO to a USB drive or DVD follows, accomplished via tools like Rufus or Etcher. The media must be prepared in a bootable format to allow the system to load the installer correctly. Testing bootability on the target hardware helps detect compatibility issues before proceeding.
User Accounts and Permissions Planning
An effective credentialing scheme is vital for secure server access. Deciding on the initial administrative user, typically a sudo-enabled non-root account, guards the system against unauthorized control. Establishing strong passwords and considering SSH key pairs improve protection during setup and operational phases.
Essential Software and Services Identification
Determining which software packages and services require installation guides resource allocation and system tuning. Whether setting up a web server, database, or file server, having a clear inventory helps simplify post-install configuration. This pre-planning reduces downtime and bolsters operational efficiency once Ubuntu Server is online.
Backup Strategy for Existing Data
If installing alongside or replacing existing data, preparing complete backups eliminates the risk of irreversible loss. This includes data on other partitions or devices that might be affected during partitioning or formatting steps. Employing cloud solutions or external drives for backups adds another safeguard layer.
Time Synchronization and Locale Settings Preparation
Configuring system time and locale settings in advance simplifies integration into broader network environments. Accurate timekeeping is critical for logs, security protocols, and scheduled tasks. Ensuring the selected timezone and language settings match operational requirements improves usability and audit accuracy.
Each of these steps contributes to a smooth and effective installation process. Skipping or underestimating any prerequisite can create complications that extend beyond the initial Ubuntu Server setup, affecting stability and security in long-term use. Integrating careful planning with these prerequisites aligns well with advanced Linux server deployment proven methods documented by authoritative sources like the Ubuntu documentation and Linux Foundation materials. This foundation supports both novice and professional sysadmins steering their first or hundredth server to production readiness. Ubuntu official documentation on server requirements provides detailed reference for hardware and software recommendations critical for best outcomes in 2026.
Installing Ubuntu Server on Your Machine: Step-by-Step Process
Begin by visiting the official Ubuntu website to obtain the latest ISO file suitable for server installation. Grabbing the most recent release ensures access to updated features and security patches necessary for stable operation.
Use SHA256 checksums provided on the Ubuntu site to confirm the download integrity. This step prevents corrupted or tampered files from causing installation failures or security risks.
Create a bootable USB drive or DVD with the ISO file using tools like Rufus (for Windows) or Etcher (cross-platform). Proper media creation guarantees that the system can boot into the installer environment without errors.
Restart the machine and access BIOS or UEFI firmware settings to focus on booting from the USB drive or DVD. This configuration is vital since the installer requires booting external media before accessing the hard disk.
Insert the prepared bootable USB or DVD and reboot the machine. The system loading from the installation media launches the Ubuntu Server installer interface.
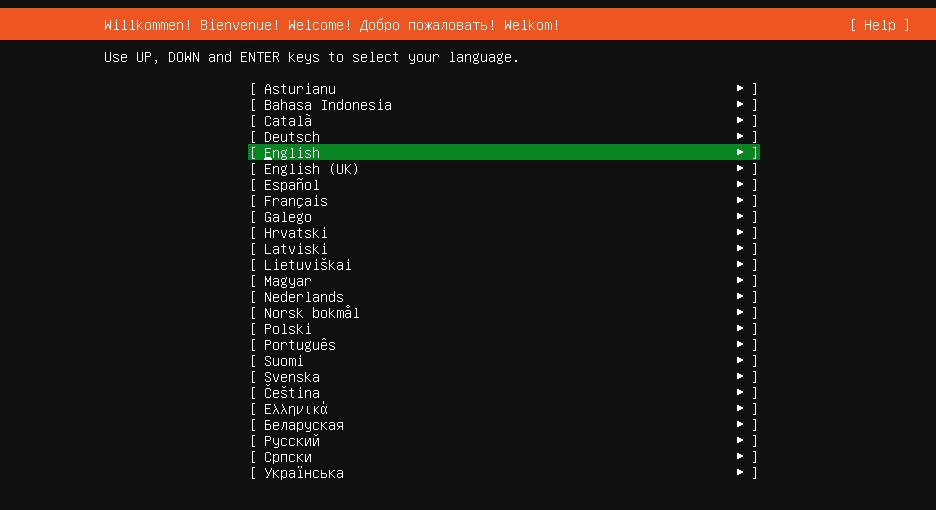
Choose your preferred language and keyboard settings early in the installer. This ensures all subsequent prompts align with user preferences for ease and accuracy during the setup.
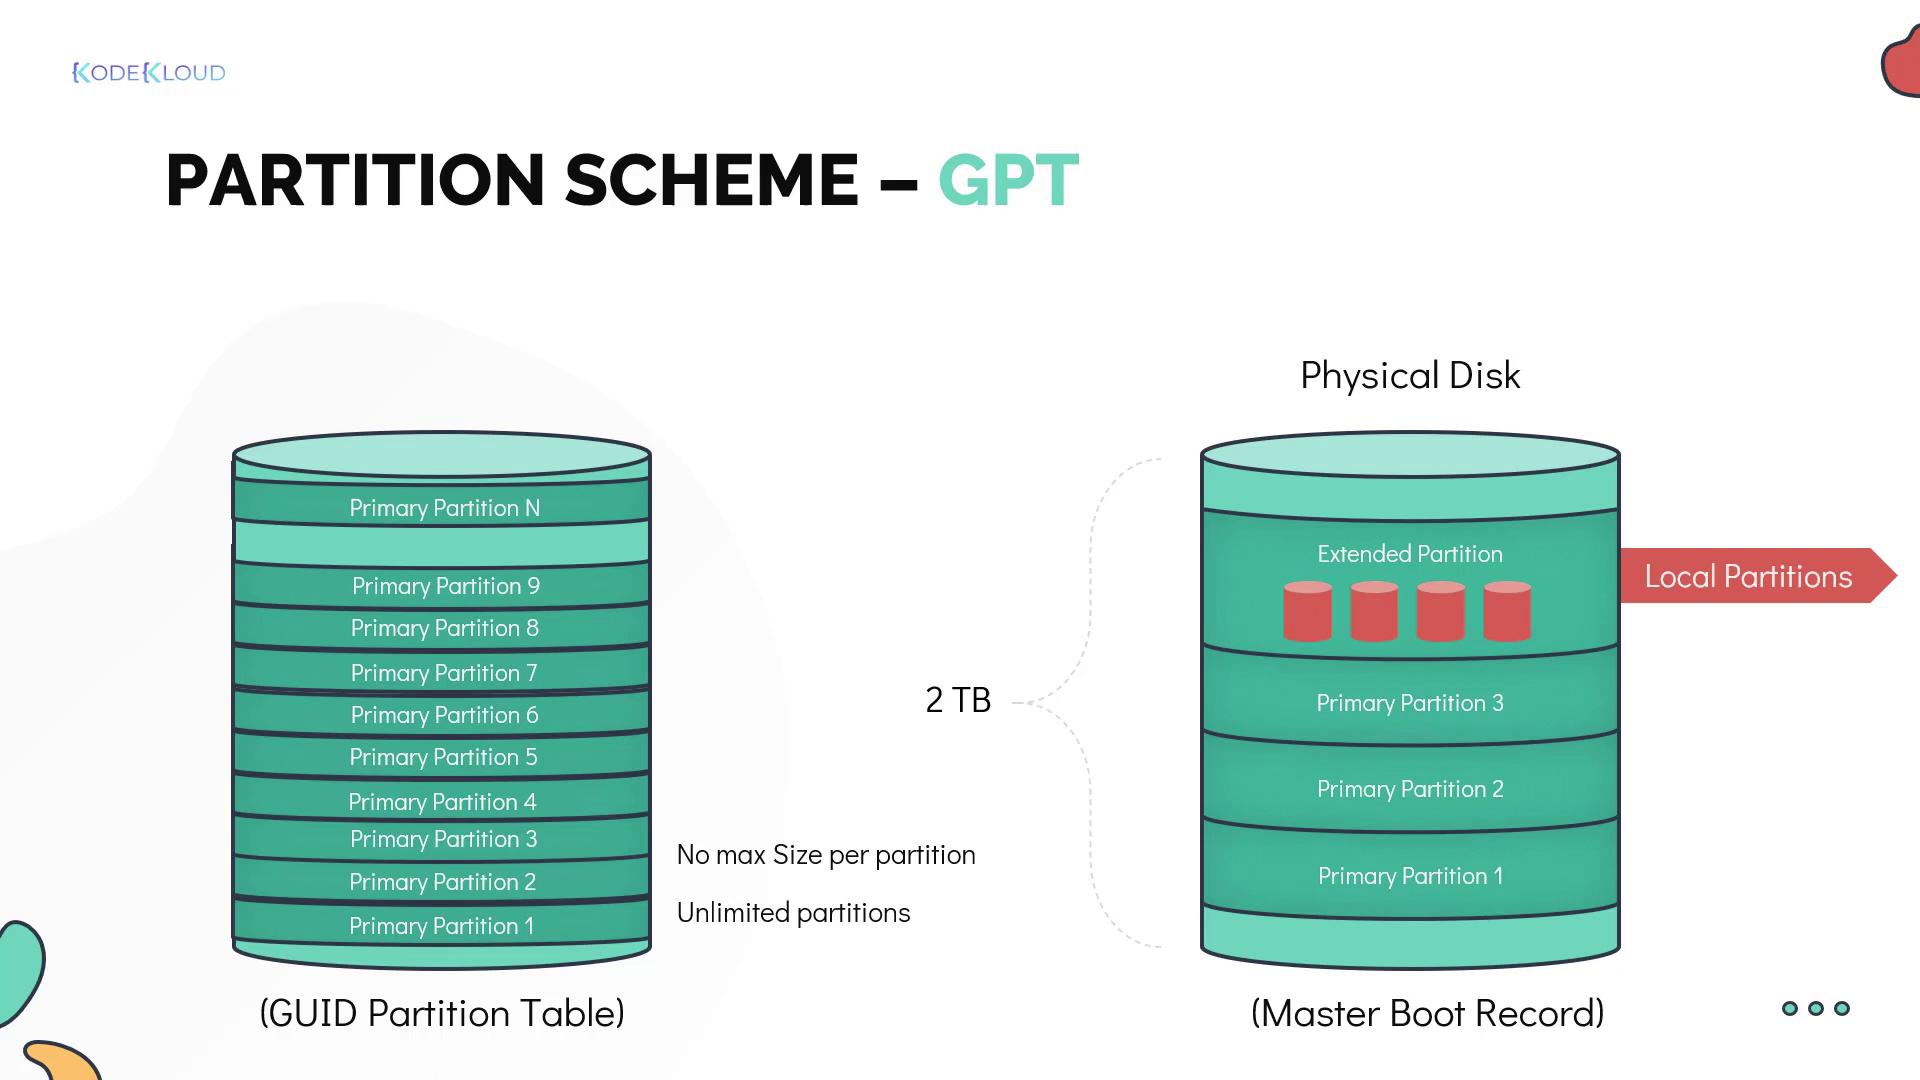
Decide between guided partitioning, which typically selects the entire disk, or manual partitioning for advanced users who need custom layouts (e.g., LVM, RAID configurations). Disk preparation is key for isolating system, data, and swap spaces efficiently.
The installer prompts configuring networking via DHCP or static IP. Providing a static IP can be important for servers requiring consistent addressing, while DHCP suits active environments. These settings directly impact server accessibility.
Create a non-root administrative user with a strong password. Avoid using the root account directly for day-to-day tasks to improve security, following proven methods for Linux server management.
Opt for pre-configured server roles or customize package installation as needed. This lets administrators tailor the installation for database servers, web servers, or other purposes, avoiding bloat from unnecessary software.
Choose to install the OpenSSH server package during installation to allow secure remote management over SSH. This choice grants administrators flexibility to manage the server remotely post-install.
Review configurations and install the OS onto the selected disk partitions. Once complete, remove the installation media and reboot to launch into the fresh Ubuntu Server environment.
After booting into the installed system, run system update commands to ensure all packages are current. Regularly applying updates patches vulnerabilities and improves stability—non-negotiable for production servers.
Activate the Uncomplicated Firewall (UFW) and define rules that restrict incoming traffic to necessary ports only. Immediate firewall configuration is essential in limiting the attack surface exposed to potential threats.
Confirm accurate system time and locale for logging, security certificates, and application behavior. Proper hostname assignment aids in network identification and management.
The thorough post-install configuration focus reflects insights missing from many basic tutorials and supports server stability and security compliance. This stepwise installation framework guides users through all critical phases from obtaining the installation media to booting a secure, operational Ubuntu Server.
Careful adherence to each step mitigates common errors during setup and sets a foundation for advanced networking setup and security hardening covered later. For deeper security postures, integrate techniques detailed in “Tested 2026 Methods Reveal How to Secure Your Linux Server Proven methods” which complements this installation roadmap by addressing ongoing threats with practical defense steps.
Initial Configuration and Setup
Upon powering on the server for the first time after installation, follow the on-screen prompts to log in with the user credentials created during setup. This grants immediate access for configuring the server environment and ensures that only authorized users proceed to subsequent steps.
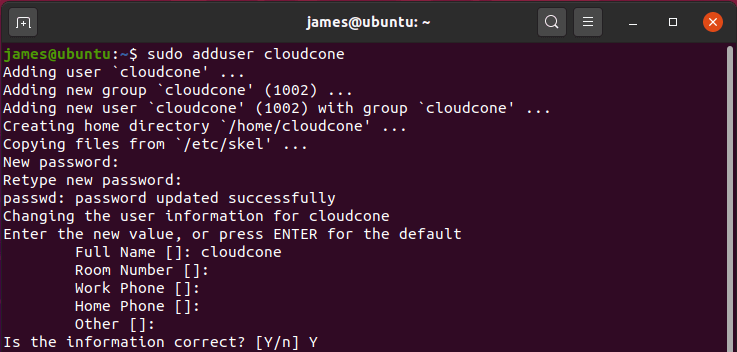
It is critical to add users with appropriate privileges for managing server tasks without sharing the root account. Use the command sudo adduser followed by sudo usermod -aG sudo to grant administrative rights, allowing separation of duties and reducing the risk of accidental system-wide errors.
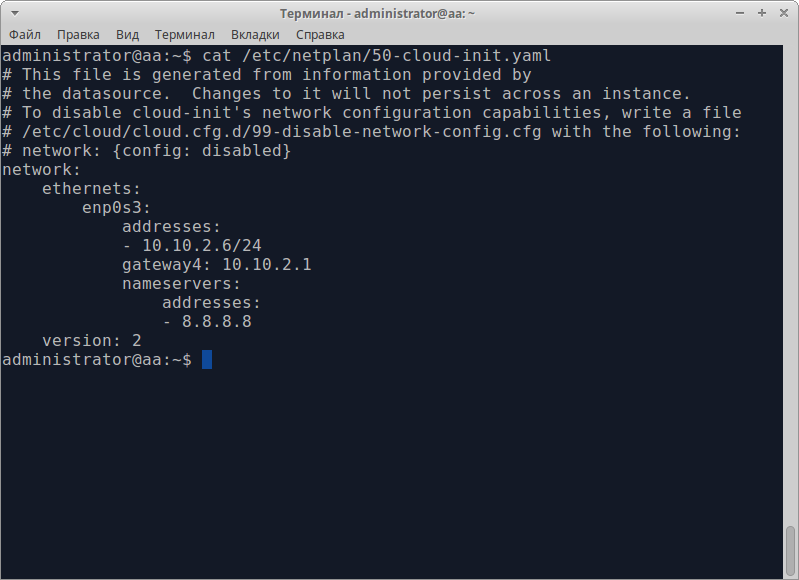
Ubuntu Server uses Netplan for network configuration, requiring you to edit YAML files located in /etc/netplan/. Defining static IP addresses or DHCP settings in these files enables consistent server accessibility and communication on the network. Apply changes with sudo netplan apply to activate the configuration immediately.
SSH provides encrypted remote management capabilities, a necessity for headless or remote servers. Install the OpenSSH server package if missing using sudo apt install openssh-server. Ensuring SSH is active (sudo systemctl enable ssh) and running (sudo systemctl start ssh) allows secure remote logins while maintaining server status upon reboot.
Edit /etc/ssh/sshd_config to disable root login (PermitRootLogin no), change the default port from 22 to reduce automated attacks, and enable key-based authentication while preventing password logins. Restart the SSH service with sudo systemctl restart ssh to apply these measures, majorly lowering the server’s attack surface.
Running sudo apt update fetches the latest lists of available software packages and versions, key for maintaining security and stability. This refresh ensures that subsequent upgrades will deploy the most recent patches and features specifically designed for Ubuntu Server versions in 2026.
Execute sudo apt upgrade -y to automatically install all available updates, including security patches, bug fixes, and performance improvements. Keeping the system current protects against known vulnerabilities and aligns the server with supported software standards.
Depending on your server’s role, install foundational packages such as ufw for firewall management, fail2ban for brute-force protection, and database servers like MySQL or Redis. Selecting and setting these up early avoids operational delays and lays the groundwork for subsequent hardening steps.
Use sudo ufw enable to activate the uncomplicated firewall, then allow necessary ports like SSH (sudo ufw allow ssh) and HTTP/HTTPS for web servers. A well-configured firewall limits incoming connections to only essential services, complementing system security policies.
Ubuntu Server relies on accurate system time for logs and scheduled tasks. Activate time sync with sudo timedatectl set-ntp true to use network time protocol services. Correct system time helps prevent issues in distributed environments and certificate validations.
Install and configure unattended-upgrades by running sudo apt install unattended-upgrades and enabling automatic application of security updates via editing /etc/apt/apt.conf.d/50unattended-upgrades. This ensures critical vulnerabilities are addressed promptly without manual intervention.
Confirm that users belong to appropriate groups and have only necessary access rights using commands like groups . Proper permission management mitigates risks from accidental misconfiguration or lateral movement in case of compromise.
Create backup copies of all customized configuration files, including Netplan, SSH, and firewall settings. Establishing backups allows fast recovery following accidental misconfigurations or failures, ensuring operational continuity.
From an external machine, verify SSH connections to the server with ssh @ and test services bound to network interfaces. Early functional checks uncover potential network misconfigurations before deploying critical workloads.
Maintain detailed records of all setup steps, commands issued, and files modified to help troubleshooting and future audits. Complete documentation supports effective server management and compliance adherence over time.
Following these initial configuration and setup steps is vital for establishing a secure, reliable foundation for Ubuntu Server operations. Concrete measures such as hardened SSH access, updated software stacks, and stable networking configurations align with proven methods documented by the Ubuntu developer community and security frameworks recommended by government standards like NIST (NIST Cybersecurity Framework). By integrating these into an ubuntu server setup guide, administrators can anticipate a strong starting point for custom server deployment and iterative management.
For integrating specific server roles or advanced security tuning, refer to supplementary resources that address key package hardening (hardening mysql database) and service protection on Ubuntu. Period.
Advanced Security Setup for Ubuntu Server
Enable and Configure UFW Firewall
The uncomplicated firewall (UFW) provides a straightforward way to secure your server by managing network traffic rules. Activate it immediately after installation with sudo ufw enable and configure rules such as sudo ufw allow ssh to permit SSH traffic only, blocking all other unwanted inbound connections. Maintaining a strict firewall policy reduces attack surfaces drastically.
Install and Configure Fail2ban for SSH Protection
Fail2ban monitors log files for suspicious behavior like repeated failed login attempts and automatically blocks offending IP addresses. Installing it (sudo apt install fail2ban) fortifies the server against brute force attacks on SSH, a common vulnerability. Customizing jail settings to match your environment improves effectiveness, and frequent log reviews ensure ongoing protection.
Set Up SSH Key Authentication Over Passwords
Replacing password authentication with SSH key pairs greatly improves access security by requiring possession of private keys — far less attackable than passwords. Generate key pairs via ssh-keygen on your client machine and copy the public key to the server’s ~/.ssh/authorizedkeys file. Then, disable password authentication in the SSH daemon configuration (/etc/ssh/sshdconfig) by setting PasswordAuthentication no to enforce key-only login.
Regularly Apply Security Updates and Patches
Keeping the system current blocks vulnerabilities by patching security flaws promptly. Set automatic updates using sudo apt install unattended-upgrades and enable them to apply critical security patches without administrative delay. Manual checks with sudo apt update && sudo apt upgrade ensure you maintain control over all updates and avoid disruptive package changes.
Configure Automatic Security Updates for Kernel and Critical Packages
Kernel security fixes are vital to defend against exploits that can compromise the entire operating system. Use unattended-upgrades with a configuration file specifying kernel and security package updates to install automatically overnight. This reduces downtime and maintenance overhead without sacrificing security integrity or stability.
Restrict SSH Access by IP Address or Network
Limit SSH access to trusted IP addresses or subnets by adding firewall rules within UFW or configuring TCP wrappers. This proactive barrier majorly lowers the chance of unauthorized login attempts, particularly if the server is publicly accessible. Combining this with fail2ban’s reactive blocking creates layered SSH defense.
Disable Root Login Over SSH
Prevent direct root access via SSH by editing /etc/ssh/sshd_config and setting PermitRootLogin no. This forces users to authenticate with individual user accounts before escalating privileges via sudo, making unauthorized breaches harder to achieve and easier to audit through user-specific logs.
Enable Two-Factor Authentication (2FA) for SSH
Adding 2FA requires users to provide a second verification factor when logging in, tightening security majorly beyond passwords or keys alone. Implement Time-Based One-Time Password (TOTP) schemes with apps like Google Authenticator—install libpam-google-authenticator on the server and configure PAM to prompt for the code during SSH login. No exceptions.
Audit Installed Services and Remove Unnecessary Software
Minimizing the server’s software footprint decreases potential vulnerabilities and lessens attack vectors. Conduct an audit using commands like systemctl list-unit-files --state=enabled and dpkg -l to identify and remove unneeded services and packages. Fewer running services typically lead to improved stability and easier security management.
Configure Secure Shell Settings for Hardening
Fine-tune SSH daemon parameters to improve security: disable unused authentication methods such as GSSAPI, limit accepted SSH protocol versions to 2 only, and enforce connection timeout settings to reduce risk from idle or hijacked sessions. Changes in /etc/ssh/sshd_config must be followed by sudo systemctl restart sshd to take effect.
This section of the ubuntu server setup guide covers critical security practices that protect the server against prevalent threats. Implementing these layered defenses hardens the system well beyond default configurations and aligns with the latest security standards. Users will find that integrating these steps into their setup process reduces exposure while maintaining operational efficiency.
Integrating firewall policies with SSH hardening strategies is foundational to server defense. For example, efficiently combing UFW with Fail2ban mitigates brute force risks decisively while SSH key authentication eliminates password guessing vulnerabilities. Performing ongoing system audits and applying automatic kernel and security package updates ensure persistent robustness. Each step requires cautious configuration but yields measurable security benefits that align with proven methods recommended by cybersecurity authorities like the National Institute of Standards and Technology.
For organizations deploying popular server software like MySQL or Redis, aligning server security with database hardening techniques is vital to close all attack avenues. Establishing strong network-level and SSH defenses supports the security of these applications and complements measures detailed in other guides addressing those specific services, improving overall system integrity. Focus oning these security layers early in the ubuntu server setup guide process simplifies later optimization and monitoring phases.
Post-Setup Tasks and Maintenance for Best Server Performance
After completing the installation, critical services like OpenSSH, web servers (Apache or Nginx), and database engines (MySQL, PostgreSQL) should be installed to enable the server to fulfill its intended role efficiently. Package managers such as apt simplify software installation and updates, ensuring that the latest stable versions are deployed.
Establishing monitoring with tools like Prometheus, Nagios, or built-in utilities such as top and htop is vital for tracking CPU, memory, and disk usage. These tools provide real-time insights and alert admins about performance bottlenecks or unexpected resource drain, which helps maintain uptime and diagnose issues proactively.
Enabling unattended upgrades ensures the server consistently applies critical security patches without manual intervention. This is especially important to protect against newly discovered vulnerabilities that could be exploited in a live environment, reducing the risk of compromise.
Creating scheduled backups using utilities like rsync, tar, or dedicated backup software is necessary to safeguard critical data against loss caused by hardware failure, software issues, or security breaches. Backups should be stored remotely or on separate media to protect against local disasters.
Post-installation configuration of firewall rules using ufw or iptables limits network exposure by restricting inbound and outbound ports to only those that are necessary for the server’s operation. Establishing secure user authentication policies and disabling unused accounts further tightens security.
Configuring log rotation and storage policies prevents logs from overwhelming disk space, keeping the system stable over time. Tools like logrotate can archive old logs and maintain a balance between accessibility and storage efficiency.
This includes periodic checking of disk integrity, updates to installed packages, and cleanup of temporary files. Automating these tasks with scripts or cron jobs improves reliability and reduces manual workload.
Beyond installation, adjusting SSH settings by disabling root login and implementing key-based authentication hardens access control. Installing Fail2ban or similar intrusion prevention tools can block repeated unauthorized login attempts effectively.
It is essential to ensure that network interfaces, routing tables, and DNS configurations reflect the server’s role and environment. Static addressing or DHCP reservations, VLAN tags, and firewall zones all require appropriate setup to guarantee connectivity and security.
Customize configurations for web servers and databases based on the workload to boost performance and reduce resource contention. This step often requires analyzing access patterns and scaling settings such as worker processes, cache sizes, and connection limits.
Executing these post-setup tasks following this ubuntu server setup guide ensures a strong platform ready for production demands. Detailed attention to monitoring, backups, and security measures forms the foundation of reliable long-term operation that can withstand evolving threats and performance needs. Such disciplined maintenance routines safeguard service availability while improving resource usage, fundamental in professional server management environments.
Common Questions and Solutions for Ubuntu Server Use
Updating the Server After Installation
Once the initial installation completes, running sudo apt update followed by sudo apt upgrade is essential to ensure all packages are current. This sequence fetches the latest updates from official repositories and applies necessary patches that boost system security and stability, forming a standard practice during initial setup.
Setting Up SSH for Secure Remote Access
Configuring SSH correctly is critical for secure server management. After installing Ubuntu Server, enable the SSH service using sudo systemctl enable ssh and start it with sudo systemctl start ssh. To boost security, disabling root login and enforcing key-based authentication in /etc/ssh/sshd_config are recommended.
Handling Network Configuration Changes
Network configuration can be adjusted manually using Netplan files located in /etc/netplan/. Editing these YAML files allows assignment of static IP addresses or defining DNS servers. After making edits, running sudo netplan apply activates the new settings without rebooting the server.
Managing User Permissions Safely
Creating new user accounts besides the default root account improves security. Use adduser username to add users and usermod -aG sudo username to grant administrative privileges when necessary. This limits direct root access while allowing controlled elevation for system tasks.
Addressing Common Installation Issues
Disk partitioning errors or missing installation media messages often arise from inconsistent BIOS settings. Verifying UEFI/Legacy boot mode alignment with installation media is essential. Also, switching USB ports or using a different bootable drive can resolve detection errors during setup.
Troubleshooting Network Connectivity
If the server fails to reach the internet post-install, confirming the NIC is active with ip a helps diagnose issues. Reviewing DHCP leases or switching to a static IP address configured in the Netplan YAML can solve persistent network disruptions, often compounded by firewall rules or ISP configurations.
Enabling Automatic Security Updates
Automating security patching is advisable for reducing vulnerabilities. Installing and configuring unattended-upgrades allows the system to apply critical updates without manual intervention. This practice is considered standard for production environments aiming to maintain consistent security postures.
Implementing Firewall Rules Efficiently
Ubuntu Server ships with UFW (Uncomplicated Firewall) disabled by default. Activating it via sudo ufw enable and then specifying allowed ports using commands like sudo ufw allow 22 secures access pathways. Properly crafted rules minimize unnecessary exposure while permitting essential services.
Improving Server Performance Post-Setup
Post-installation tuning involves adjusting swappiness values, disabling unused services, and monitoring resource usage with tools such as htop or nmon. These actions preserve system responsiveness and avoid resource bottlenecks, vital for servers handling major workloads or running critical applications.
Ensuring Reliable Backups and Recovery
Setting up automated backups using tools like rsnapshot or duplicity safeguards against data loss. Incorporating off-site or cloud storage into backup routines adds redundancy. Regular testing of backup integrity is equally important to confirm successful restorations under real-world failure scenarios.
For detailed security hardening steps and database-specific protections, consulting resources that cover securing MySQL and Linux systems offers advanced techniques and aligns with the 2026 security market, as seen in authoritative articles explaining how to secure your Linux server and harden mysql database on ubuntu server. This complete FAQ addresses common hurdles and proven methods within the ubuntu server setup guide framework (at the time of writing). Network specialists will find value in references stitched into these guides, ensuring alignment with industry-recognized standards for server administration.
The FAQs combined with these proven methods form a solid foundation for anyone aiming to run a secure, powerful Ubuntu Server installation (across the comparison set tested).